> ## Documentation Index
> Fetch the complete documentation index at: https://help.gravityblogs.com/llms.txt
> Use this file to discover all available pages before exploring further.
# Quickstart
> Go from 0 to 1 and build your first Programmatic SEO website using GravityBlogs.
In this tutorial, we will create a Programmatic SEO website using [GravityBlogs](https://gravityblogs.com), hosted on [WordPress](https://wordpress.org) CMS.
## Prerequisites
Make sure you have the following things checked:
* A valid GravityBlogs account with subscription ([Signup here](https://app.gravityblogs.com/))
* A WordPress website hosted on a domain
* Dataset for your niche in CSV format (check [Google dataset search](https://datasetsearch.research.google.com/) to find dataset for your niche)
* REST API enabled on your WordPress website (by default, REST APIs are enabled, but a security plugin may block your WordPress REST API access)
## What are we going to do?
In brief, we will do the following things:
1. Connect our WordPress site to GravityBlogs
2. Create a new campaign
3. Fill the content template in our campaign
4. Publish the campaign
Each *step* is further divided into multiple *sub-steps*. Please make sure to follow them properly.
Let's get started, shall we?
## Step 1: Connect your website
In this step, we will connect our WordPress website to GravityBlogs.
Watch the following video or read through the steps below.
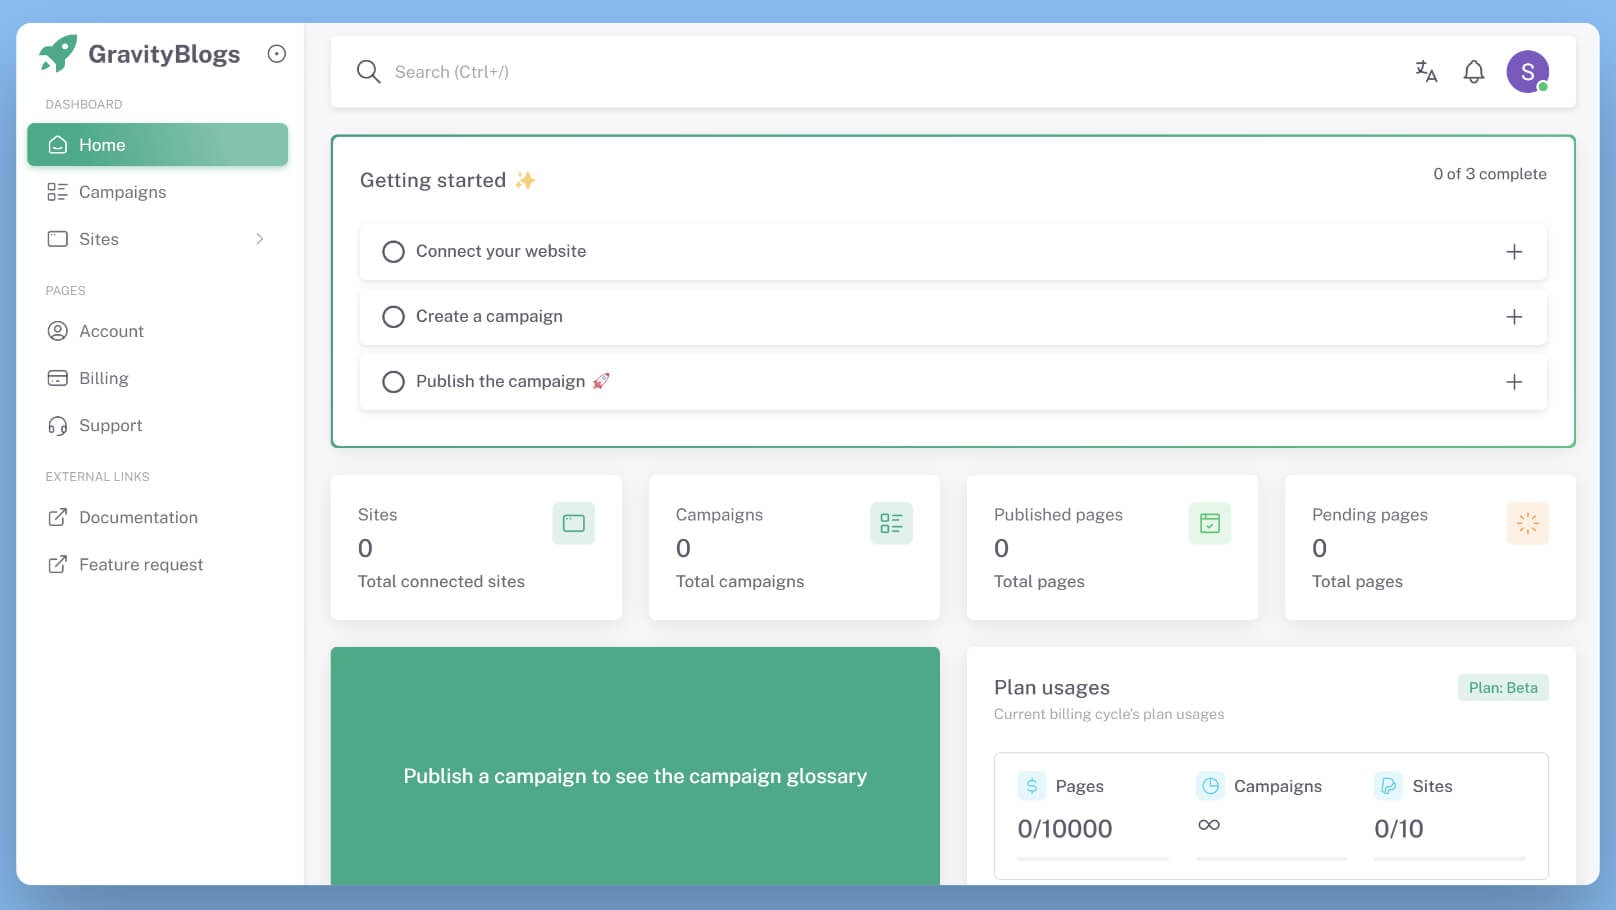
When you first log into GravityBlogs, you will see something like this:
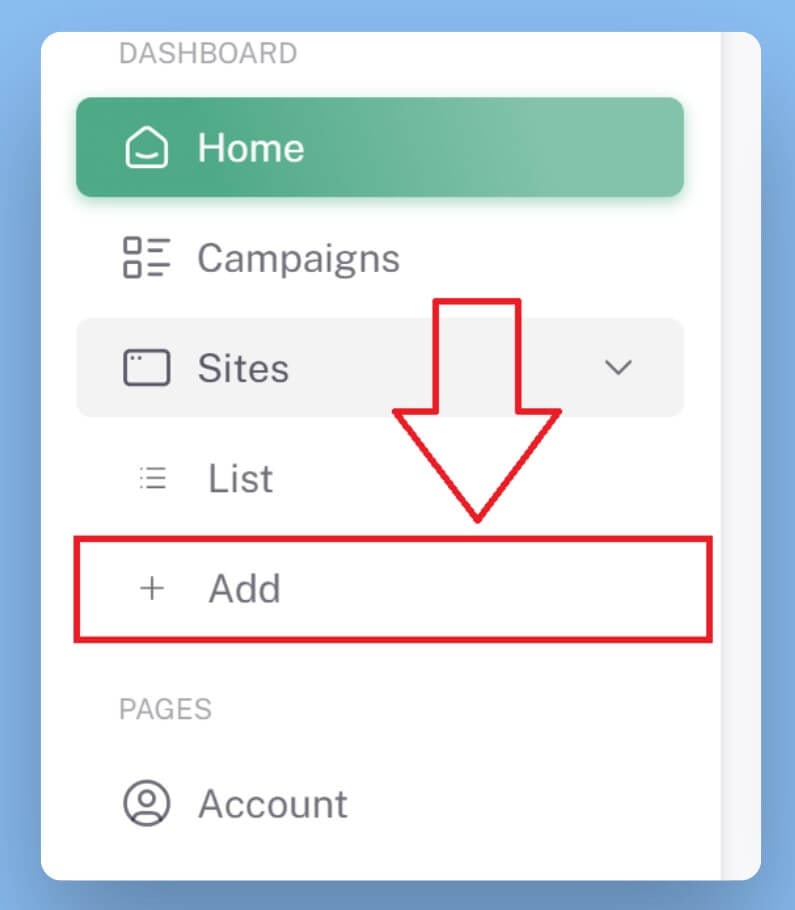
 From the **Sites** menu, click on **Add**.
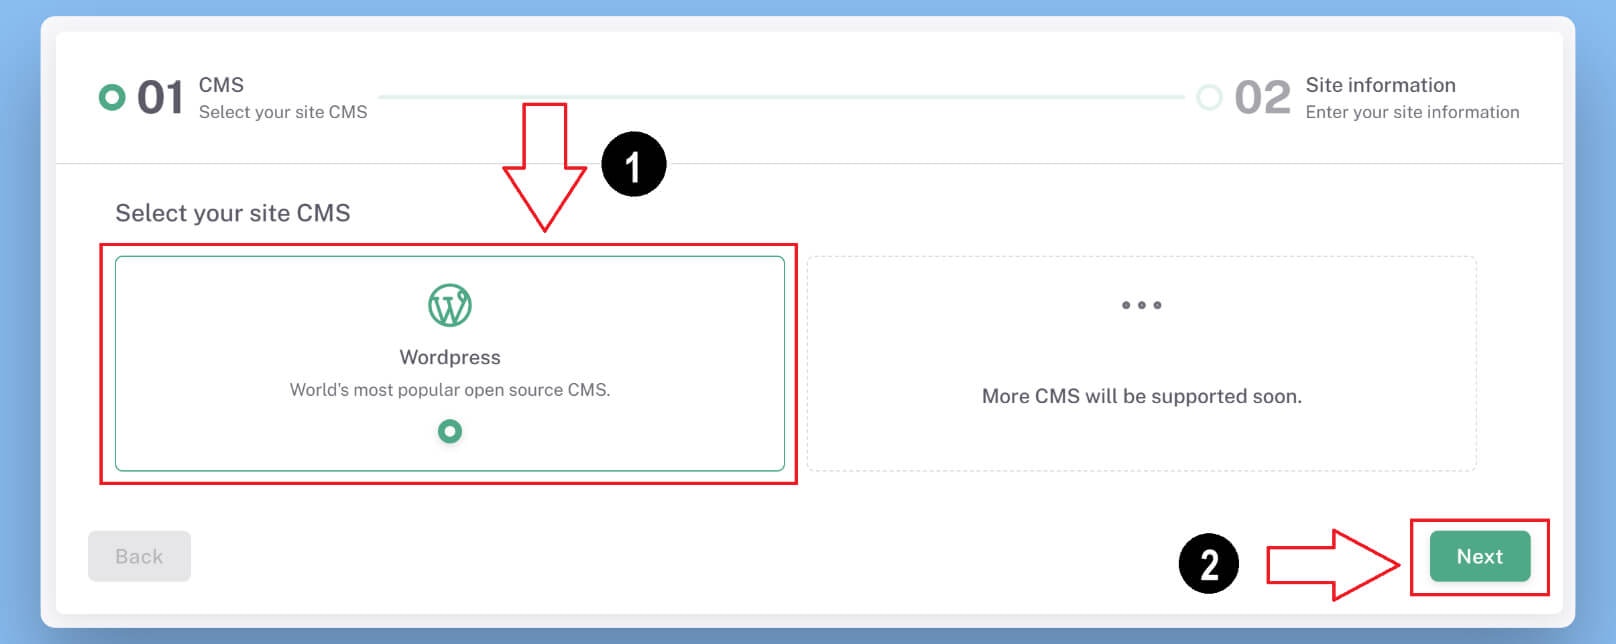
 You will see a list of CMS. Select **WordPress** and click Next.
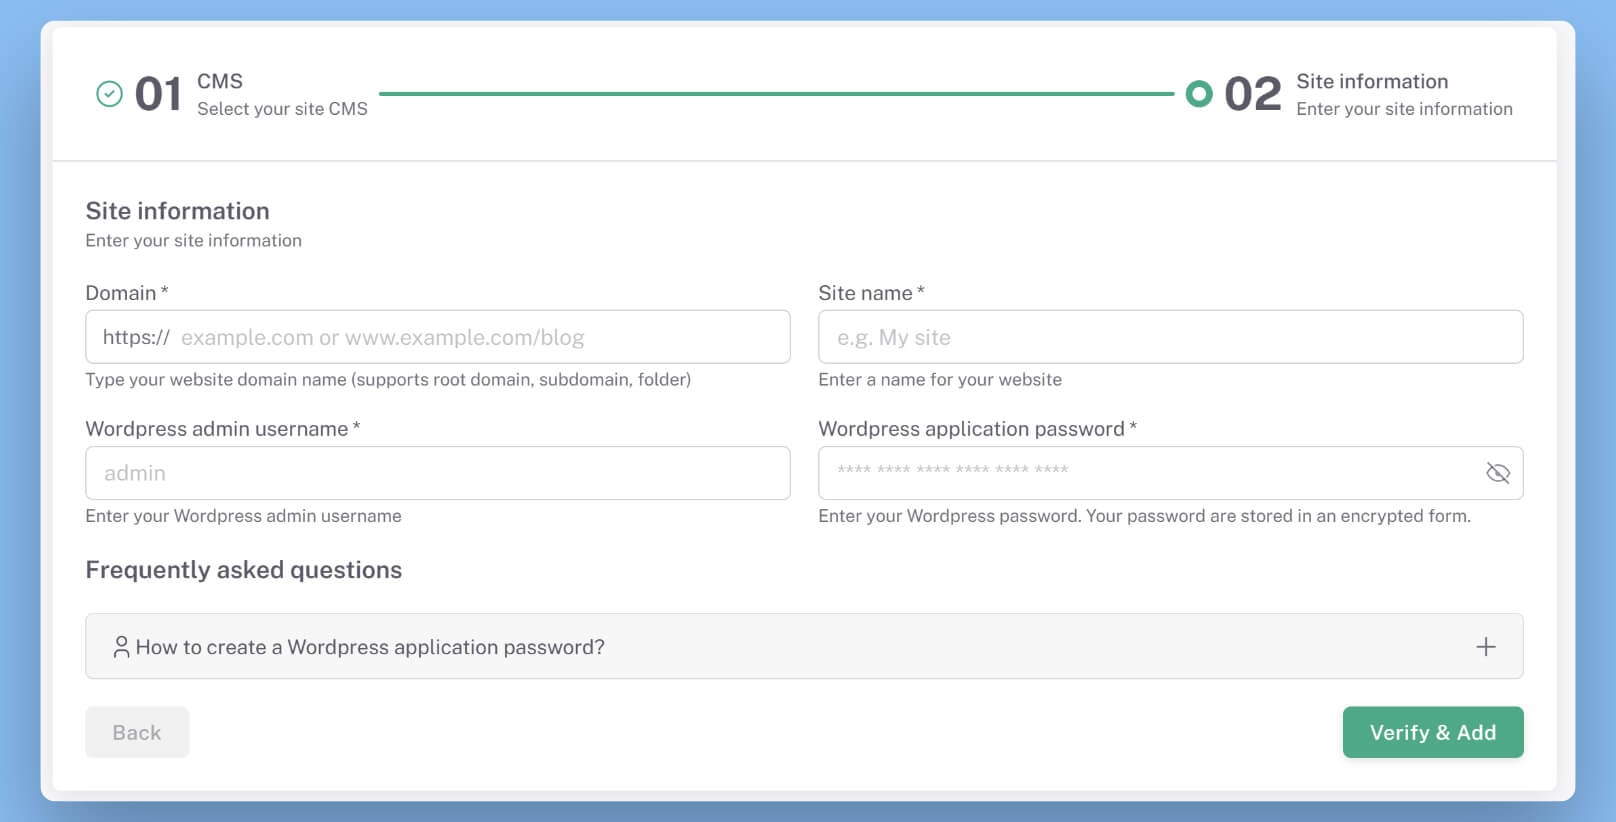
 Fill all the required details in the form and click **Verify & Add** to connect your website.
Check our dedicated [WordPress integration guide](/integrations/wordpress) if you face any issues.
Fill all the required details in the form and click **Verify & Add** to connect your website.
Check our dedicated [WordPress integration guide](/integrations/wordpress) if you face any issues.
 ## Step 2: Create a campaign
In this step, we will create a new campaign for our connected WordPress site.
From the dashboard, click on the **Campaigns** menu.
Click on **Create new campaign** button. A form will open up.
Enter a campaign name and select our newly connected site.
## Step 3: Content template
In this step, we will create content template for the newly created campaign.
After our campaign has been created, we need to upload a dataset for Programmatic SEO. Upload a dataset if you
already have one, else check
[Google dataset search](https://datasetsearch.research.google.com) to find a dataset for your niche.
Check our guide on [how to prepare a dataset for Programmatic SEO site](/guides/programmatic-seo-dataset).
It's time to create our content template.
Enter all the required details for the content template and use template variables and AI prompt box to
dynamically generate the content.
Learn more about Content template here (coming soon)
Once you are good with the content template, click **Next** and you will be taken to the schedule options.
Here, you can define schedule settings for your campaign. Based on these settings, your campaign will generate
and publish content to your website.
## Step 4: Publish campaign
In this step, we will publish our campaign.
Once you have filled all the required content template data, the campaign is ready to be published.
Simply hit the **Publish** button and your campaign will be live instantly.
Based on your publish frequency, content will be generated and published directly to the WordPress site.
Congratulations 🎉
You have just published your campaign. Now you are ready to rock the Programmatic SEO world.
## Further reading
* Check out the [Guides & Tutorials](/guides) series
## Troubleshooting
If you are facing problems with any of the steps, please check the following troubleshooting guides:
Facing issues with WordPress connection?
Facing issues with your campaign?
Check all the [troubleshooting guides here](/platform/troubleshoot)
## Step 2: Create a campaign
In this step, we will create a new campaign for our connected WordPress site.
From the dashboard, click on the **Campaigns** menu.
Click on **Create new campaign** button. A form will open up.
Enter a campaign name and select our newly connected site.
## Step 3: Content template
In this step, we will create content template for the newly created campaign.
After our campaign has been created, we need to upload a dataset for Programmatic SEO. Upload a dataset if you
already have one, else check
[Google dataset search](https://datasetsearch.research.google.com) to find a dataset for your niche.
Check our guide on [how to prepare a dataset for Programmatic SEO site](/guides/programmatic-seo-dataset).
It's time to create our content template.
Enter all the required details for the content template and use template variables and AI prompt box to
dynamically generate the content.
Learn more about Content template here (coming soon)
Once you are good with the content template, click **Next** and you will be taken to the schedule options.
Here, you can define schedule settings for your campaign. Based on these settings, your campaign will generate
and publish content to your website.
## Step 4: Publish campaign
In this step, we will publish our campaign.
Once you have filled all the required content template data, the campaign is ready to be published.
Simply hit the **Publish** button and your campaign will be live instantly.
Based on your publish frequency, content will be generated and published directly to the WordPress site.
Congratulations 🎉
You have just published your campaign. Now you are ready to rock the Programmatic SEO world.
## Further reading
* Check out the [Guides & Tutorials](/guides) series
## Troubleshooting
If you are facing problems with any of the steps, please check the following troubleshooting guides:
Facing issues with WordPress connection?
Facing issues with your campaign?
Check all the [troubleshooting guides here](/platform/troubleshoot)